Wednesday, June 27, 2018

Spa Day


We all know that we need to oil our machines every 8-10 hours of sewing and I do that faithfully.  But, if you've taken a maintenance class from me, you know that I tell you I can't forget the every six month spa day when I grease the gears and lube the motor.  I told you that I do it every year between Christmas and New Year's day.  Sometime in that week, I get all the FWs out that are at the winter house and they get their day of pampering and such.  But, how do I remember the 6 months later spa day.  Well, this week is my birthday week, 6 months from Christmas and New Years so this is the week and today is the day this year.


So, here are the 6 machines I currently have at the summer house patiently waiting for their turn.  This is only half the crew but the other machines are at the winter house and they'll get their spa day when I return.  And, it looks like Skanie get's her spa day first.  I have all the tools I'll need out and the gear grease, the motor lube and yes, the oil to give the once over. 

I want to see if the motor lube is being used as I sew.  That's important.  If no lube is used it might mean the old lube has hardened and clogged the port.  Whatever I find, the old lube gets removed and new lube gets put back for another 6 months of faithful sewing.  Then, I check to see if the gear grease is darkened or is it still kinda clear?  Kinda clear means the old gunk has been worked out.  If the grease is dark or black and hard, it's really important to remove all of it and put new grease on the teeth of the gears.

And, just to be thorough, all the metal to metal parts will be oiled, 1 drop in each spot and each and every FW baby of mine will be up and running to beat the band.


It's fun for me to line up the machines and see the differences in them.  Some have the pretty scroll face plate.  Others have the more modern looking striated face plate.  Some shields are the centennial ones.  Some are the older red S shield.  There were so many changes that were made over the years and I do enjoy seeing each one.

Okay,   I guess I'd better get busy so I can get all these done today.  It's a good way to spend a day of my birthday week.  So, here's your reminder, dear friends.  Go give your machines their spa day.

Wednesday, June 6, 2018

Let's talk needles and skipping stitches on your featherweight

Yes, I'm still working on the elephant quilt but I thought I'd take a break from that here on my blog and give you a featherweight tip to think about.


When I'm teaching the featherweight maintenance classes, people ask me all the time, "what size needle do I need to buy for my Singer featherweight 221/222?"  And, my answer is always, you need to use a standard 15 x 1 needle for your sweet machine.  That's a regular sized needle, the kind you buy for all your modern sewing machines.  There's nothing special to buy.

Well, nowadays there are so many different kinds of needles that it's hard to know what to use.  There are needles to sew jeans or needles for using metallic threads.  There are needles for knits and needles for leather.  But, those are all 15 x 1 needles.  Any of them can be used in the FW 221/222.


I've come to love the needles made by Schmetz.  Those can be found in most any quilt shop or box store that would carry needles.  And, there are a huge amount of different kinds for all sorts of sewing needs.  The standard universal needle is fine.  The larger the number the thicker the needle.  And when you sew heavy fabric you need that thickness so your needle won't break so easily.  Not too long ago I discovered a chart from Schmetz to tell me what size and kind of needle I had based on the color placed on the needle shaft.  Here's the link to that chart.  https://www.schmetzneedles.com/schmetz-color-code-chart/.  So the needle here in my hand is purple on top so that means it's a microtex needle and the color below is kinda orange so the size is 80.  That's a very standard size with a very sharp point.  I like this needle a lot.

Can you use needles that were in the FW box when you bought your machine?  Sure.  You can use them.  Try them out.  They are what was sold at the Singer store to use with your machine.  If it's not rusty, it will work.  I've found a ton of those needles from smaller packages to boxes of a 100.  And, I use them from time to time for regular piecing of quilt blocks or regular sewing, and they are fine.


So what should you know about needles and your featherweight?  Well, look at the top of the needle and you'll see there is a flat side.  On all machines, vintage or modern, the thread always enters the eye of the needle from the side opposite that flat side.  If you look closely, you'll also notice that there is a groove that runs down the shaft of the needle opposite the flat side as well.


You all know to place the needle in the needle clamp with the flat side to the left, right?  Remember when I told you the throat plate is your reminder about placing the flat side of the needle to the left?  The throat plate is straight (flat) on the left.

Well, it's sometimes hard to see when the flat side is exactly straight to the left.  What if it is slightly turned to the front or to the back?  Well, that's where you can sometimes have skipped stitches occur.  So, if you get a skipped stitch and you've tried re-threading the machine to no avail, try moving the needle slightly to the right or slightly to the left to see it that helps eliminate that skipped stitch problem.  And, of course, thread the needle from right to left.


It might be a good idea to think about getting one of those great needle threaders if you have problems threading the needle.  There's a needle holder at the other end as well so you can hold the flat spot in place as you insert the needle into the needle clamp.

And as far as the question about how often to change the needle, I always say that any new quilt deserves a new needle.  That means that every 8-10 hours or when you oil the machine ('cause they recommend oiling every 8 hours), change the needle

Okay, that's all I have for you today.  Enjoy sewing with your sweet little featherweight and I'll get back to sewing the elephant quilt templates.  I'll give more PP suggestions in the next post.


Sunday, June 3, 2018

Paper Piecing - Love it or Hate it

I happen to really like paper piecing (PP).  Maybe I don't LOVE it but I find it pretty simple even when it's a complicated pattern like this elephant quilt I'm working on.  If you don't know what I'm talking about, go back one post and you can read about this quilt I'm working on at the moment.


Why do I like it so much?  Well, you just stitch on a straight line.  What's more easy than that?  And, I don't have to worry about whether to use a scant 1/4" or a true 1/4".  It comes out perfect every time.

So, why do so many ladies really dislike PP?  I usually hear they don't like it for 2 reasons.  One is that they say it wastes fabric and that's probably true.  You will get some scraps that can't be used for much else.  The way I solve that problem is that I always buy a little more fabric than what a PP pattern calls for.  I do that whether it's for PP or not because I like having a little fabric in my stash that I can pull out and use for something little or different.  But if you're careful, PP won't waste much fabric.

The other thing I hear about PP is that lots of people get frustrated because you have to fit and refit pieces to get them to fill a certain space and lots of people find themselves making mistakes and the seam ripper wants to be their best buddy if you're not careful.  So, how do I solve that problem?  You really do have to be able to look at your fabric and template in weird ways.  A piece of fabric seems like it should fit but when you sew it the fabric just doesn't meet the edge or gets cut off entirely.  So, I do have some suggestions for those problems a little later on during the sewing of the pieces.

I have a couple of rules I follow when PP or doing any sewing.  One is that if I'm tired or busy, I'm going to make mistakes.  I can recognize it when I get there.  It's just best to take a break or quit sewing for the night when that happens.  You do have to concentrate when PPing.  The other thing is that you need certain tools for PP or any sewing.  I want a good ruler that's not huge and has an easy to see 1/4" line to measure 1/4" from my stitching lines.  You remember those lines I stitched without thread?  I call them the holey lines. It's essential to measure lots of times to cut fabric 1/4" away.  I found the perfect ruler.  It's the 2 1/2" x 10" Creative Grids ruler with the hearts on it.  You'll see it lots of times in my pictures. You'll also need a good sharp rotary cutter and your usual sewing things.  Don't forget the seam ripper.  If you don't have it you'll need it.  That's the rule.

The PP templates will have a sewing line (solid for my project) and a 1/4" seam allowance line (dotted for this quilt).  I like to trim away the paper 1/4" larger than the seam allowance (dotted line).  Extra paper seems to get in the way but I like having a little extra so if a fabric isn't perfectly to the edge I have a little fudge room.  You know what I mean, just a little extra room for error.


So, I'm ready to sew.  Good PP templates have numbers to tell you the order to sew the fabrics. You have to follow the correct order or you're in big trouble.  In the case of the elephant quilt, the numbers are the template piece and Violet Craft used letters to signify the order.  So, I'll put the first fabric in the "A" position with the wrong side of the fabric facing the paper.  This is the only piece of fabric that gets placed on the paper this way.  All the other pieces of fabric will be placed with right sides together.

I like to trim 1/4" away from the stitching lines for this first piece and I pin the fabric in place using tiny applique pins that tend to stay out of the way.  Fabric will scoot so pinning helps keep things from shifting.  I just fold back the template on the holey lines and measure 1/4" away and cut.


Once the 1st piece of fabric is placed, pinned and trimmed in the "A" spot it's time to position the second piece of fabric that will cover space "B".  I like to cut my big piece of fabric into a strip that will be large enough to cut several sections as needed.  I think trying to cut little pieces off the larger chunk of fabric is one place where people get messed up.  Anyway, I use that 1/4" straight edge that I cut (1/4" away from the stitching line) and I line up my "B" fabric, right sides together. The "B" piece was pretty easy to pin and stitch and fill the space.  But, now I have the "C" piece to fit and it's a wonky line.  I'll mess up if I don't audition that "C" piece.  Does it look like it will fit correctly the way it's pinned in place?


To audition my pieces before I sew,  I fold my template back flat and pin along the sewing line being careful not to bunch up my fabric. That's what I've done in the picture above.  Then, fold the fabric back to see if it fits.  If it does, great. Yup, my "C" piece fits just fine so now I can sew.  If it doesn't fit,  all you have to do is refit and repin to audition it again.  There are times when I have to refit and audition several times.  I'd rather do that than have to take out stitching several times.  I know my seam ripper doesn't like to be all alone and set aside but I'd rather not have to use it every stitch I make.


Once the piece fits and I've sewn it, I can trim the excess fabric away along the outside edges and 1/4 from the holey line for the next piece to be placed.

Okay, that's how simple this PP stuff is.  I'll take a break and add more information in the next post.  I hope you'll find a PP block that you'd like to do and sew it along with me.  And have a great sewing day.  I'll add the next instructions in a few days.
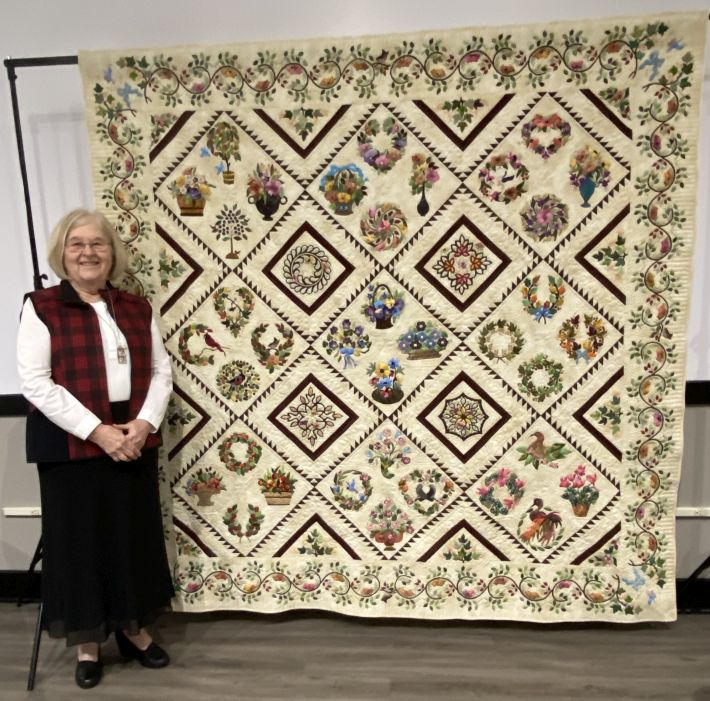
Thursday, May 31, 2018

The elephant wedding quilt project beginning

The holiday is over and I'm ready to get started on my summer project.  My grandson and his bride to be picked the Elephant Abstractions quilt by Violet Craft as their wedding gift from me and I have nearly a year to get it done.  So, let's get started.  This may become a tutorial for paper piecing that I'll post as a tab later but let's see how this goes.

Getting organized is probably one of the most important things to do with a project of this size.  Mom was an organization queen and I learned from her so getting the steps to being ready for this project really isn't so bad.  To start with I had to take the pattern template pages to the office supply place and have every page printed to be used.  The templates in the pattern came printed front and back so you wouldn't use those and not have a pattern in the end.  Okay, that's done. It took awhile to cut all the templates apart and stack them in order.  There are 97 templates.  I have my work cut out for me.


Then, I always stitch the lines on the template pages without any thread in the machine top or bobbin.  I do that for 2 reasons.  For one, it makes folding on the lines so much easier.  And, I'll fold on those lines over and over.  The other reason is that when you're ready to tear off the paper, you have lots of holes to make it tear smoothly and cleanly.  Okay.  All the holes are stitched in all 97 templates.  Whew!  That's done.


Okay, paper templates are ready and stacked up in number order.  It's time to get the fabric washed and ready.  I wash my fabric before sewing just because I've always done that.  All this fabric is from the quilt shop so I know it's not going to bleed colors or anything like that.  But there could be a bit of shrinkage here and there. It is cotton after all and cotton shrinks. I'd rather have that out of the way now rather than have a surprise later. But, will I be able to tell which grey is metal and which is titanium once it's washed?  I decided to write the names of the fabrics detailed in the pattern with permanent fabric pens in the selvage of the different fabrics.  I don't want to get mixed up.  That would be bad.


And, I ironed each piece of fabric and folded it for cutting later in the process.  This pattern's color coding is by designs printed on the templates and by name.  So, just having the names won't help me much when I'm picking up fabrics and sewing them onto the template paper pieces.  So, I copied the designs from the templates off my printer to pin them onto the fabrics as well.  Okay.  I think I'm ready to start sewing.  Hmmmm 97 templates??  How long do you think this will take?  I'll try to post my progress and further hints and suggestions for paper piecing as I go along.  Keep checking in.  This is going to be FUN!!

Saturday, May 26, 2018

Happy Holiday this Weekend!!


Those that know me are aware that I move twice a year and this past couple of weeks we were so busy with the Spring move.  But, we're here and it is so nice to be back  home in the Northwoods looking out over the lake and listening to the birds outside my window.   We were supposed to have company this holiday weekend but unfortunately that got postponed so the Big Guy and I are getting little things done around the yard and trying to relax a little more than usual.  I need a little relax time to get my creative juices flowing again.  When I'm so busy I can't think up wonderful things to do or tell you about.

This is the Memorial day weekend with parades and picnics and folks getting together.  I do hope that's the case for you and your family.  It's a time to remember those that have fought and put their lives on the line so we can live in this great country.  We probably all have someone close to us that gave his or her life protecting our way of life.  Honor them with a flag in the wind and a prayer of thanks on our lips.

I told many of you at the last FW Club Class that I'd be working on a paper pieced elephant quilt by Violet Craft this summer.  It's the pattern my dear Grandson and his bride to be picked for their wedding quilt so I've been busy the last couple of days starting to get the fabric ready, the templates stitched with holes for the paper piecing and the chart of what fabric goes where.  I think it's organization that will keep me 'on track' with this quilt.  But,  I hope you will follow along with me as I work on this one.  I'll try to post pictures so you can see how it's coming.  It's going to be a paper piecing tutorial so if you've not done PP, you'll learn some tips that I tell people when I teach PP classes.

So, I'll go watch a ball game with my hubby and then work a bit on some quilting.  I hope your holiday is a pretty one filled with all things good.

Thursday, May 10, 2018

Information about the FW Case Cover Pattern now available


You FW gals sure have done a nice job with your FW Case Covers.  We had a bunch of them at the FW Club Class again on Sunday.  You know I had to take a picture!

WoW!!  I can't believe all the interest in the FW Case Cover pattern that we've been working on this Spring.  I have the okay from Laura Coia and her SewVeryEasy You-tube site to make this pattern available to anyone that would like to purchase it.  Laura's You-tube was the inspiration behind the cover and even though I made several changes to her instructions, I felt it was important to ask her permission.  I sure didn't want to break any copyright laws and such.  I encourage you to go watch some of her You-tubes.  She covers many sewing things.

Anyway, if you are interested in the pattern, go over to the 'items for sale' tab over there on the right and you'll get all the information you need.  If you have questions, email me. I sent the pattern free to the 1st 5 people that emailed me for the pattern and they sent revisions that I incorporated into the pattern.  It is now ready and for sale.  Go check it out.

Okay, I'm off to take a bobbin lace class and then, it's back to doing all the stuff we all have to do!