Monday, December 31, 2018

Happy New Year- 2019 Begins


Happy New Year, Everyone!!

I love New Year's Eve even though we don't go anywhere and usually no one comes here.  It's just a good day to reflect on the past year with all its ups and downs and look forward to the year to come.  The Big Guy and I have spent about 55 New Year's Eves together and now we are thankful that we both will share another one.  Getting old together has certainly made us realize how important the people are in our lives.  So, now we are ready to start another year.  Who knows what this one will bring?


For one thing, having so many featherweight friends has been a blessing these past couple of years.  I'm still amazed at how many ladies come each month to the FW Club class and are so eager to learn more and more about their FWs.  And, I feel so honored that you all trust my knowledge and skills along those lines.


The one FW retreat we had last year was such a blast.  You know I was a little nervous about it before it happened but oh my!  Now we'll have 3 this year.  What else can happen in this upcoming year?  I just bubble over with excitement each month as I prepare for the next class or the next retreat.  You all encourage me so much and fill me with ideas and fun stories.  What an amazing group you all are.

So, tomorrow is the first day of the next year.  The holiday will soon be over, the messes cleaned up and the tree dismantled.  And preparations for the next class or the next quilt. will begin.

I just wanted to take a minute and say, Thank you, dear friends.  You boost me up every day and keep me going.

Happy New Year Everyone!!


Wednesday, December 26, 2018

Almost to the New Year..... so much to do for my featherweights


Well, here we are.  It's the week between Christmas and New Years so you know what I will be doing this week, right?  I'll be giving all my FWs their semi annual spa day.  I'll oil them, grease the gears and remove the old motor lube and replace it with new.  It's also a good time to check for threads in places they shouldn't be and also a good time to remove the throat plate and get any lint out of that area.  Your machine will thank you for all this by clicking that beautiful click and making that beautiful seam.

If you are close enough to Tecumseh, Michigan, come to our FW Club Class next week and we'll be doing a refresher on one part of the spa routine.  Ladies have been asking me to include the oil/grease points again.  Some haven't had a class on that in a couple of years.

I do hope you had a wonderful Christmas and are ready for the new year to make its appearance.  What will you plan on making in 2019?  I'm working on my list of UFOs.  Thank goodness I don't have as many as I had last year.

Friday, November 30, 2018

And, the Christmas season begins


How many maintenance classes did I teach last month?  Was it 4 or 5?  I know it kept me super busy and now I just have the Club Class this next week.  It is the Christmas season after all, and you know how busy we all get this month.

There will be Case cover classes in January and the retreat in February.  You all keep me so busy when I'm down here in the winter.

And, I've scheduled a 2nd retreat in August.  I'll give more information about that in the coming weeks.

How are all of you doing?  Have you had a chance to sew with your sweet FW lately?  I tend to use Sweet Baby Jane, my first FW, a lot.  I'm ready to sit down and look at my UFO list of quilts to see if I can possibly finish one more before the end of the year.  Do you all make a list of UFOs at the beginning of the new year?  I wonder which one of you has the most or the fewest UFOs.

Okay, I'll try to post again this week.  I know I've not been very good at getting a post made as often as I'd like.  That will be a new year resolution, I guess.


Thursday, October 18, 2018

Do you know someone that needs a FW Maintenance class?

Whew!  It's been a busy couple of weeks getting everything loaded at the summer house, moved, and unloaded at the winter house.  I've found muscles that I didn't know I had.  There are piles everywhere needing to be gone through and put away and I'm being careful not to trip over something to break a bone or two.  I did that once.  I tripped over a FW machine in its case and broke my upper arm a few years ago.  I put the sewing machines away when I bring them into the house now. I don't need another broken arm.

But, the reason for this post is to let you know about a few FW maintenance classes I'll be teaching in the next couple of months.  If you need a class or know of someone that needs a class in the SE Michigan area or near Columbus, Ohio, here are the details about those classes.


There will be 3 maintenance classes at the Quilt Patch in Tecumseh, Mi this fall.  They will be Saturday, Oct 27, Tuesday, Oct 30, and Friday, Nov 9.  The class runs from 10:30-3:30 and the cost is $50 plus oil and grease.  You need to call the Quilt Patch at 517-423-0053 to get on the class list.

The last class for this fall will be at the Heavenly Stitches Quilt Shop in Lima, Ohio.  That one will be Saturday Nov 17 from 10:30-3:30.  The cost is $75 and that includes the oil and grease.  The phone number for the Heavenly Stitches shop is 419-979-0218.  I talked with the owner yesterday and there are only 2 spots open for that class.  Again, call to get your name on the class list.


You can look over in my Class Schedule section to see what you'll need to bring and you know you can email me if you have any questions as well.  I hope you will let others know about these classes if they've been looking for one to get those beautiful FWs up and running properly.

Monday, October 8, 2018

Introducing Queen Anne

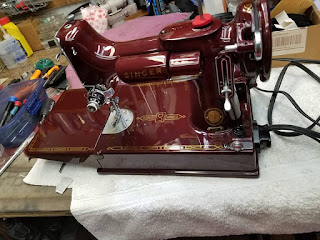
Good morning, all.  This is packing and moving week so I don't have a lot of time for a post.  I wanted to show off the poor Ugly Betty featherweight that I worked so hard to get sewing again now that she's been transformed to a beautiful Queen Anne.

I know, there are some people that don't want any machine painted.  They want the original color, the original finish and the original everything.  Well, I like all the small imperfections on an original machine, too.  I don't want to make a whole lot of changes if there's just a scratch or two that just shows the machine was loved.

But this poor machine was beat to death.  She had died.  She didn't work and she was an ugly mess.  So, it's been about a year since I rescued her and brought her back to life.  She has a whole lot of new things from new wiring to new rubber feet, bed plate felt and more.  And, now she has a face lift, too.

Introducing Queen Anne, the reborn FW.


This picture is from the painter in his shop.  I have the machine now but there was a slight imprint of the packing towel on the extension plate so that is back at the shop being fixed.  When I get back to the winter house, the plate will be put back on and Queen Anne will be ready to make her debut at the first FW Club class coming up in November.  I welcome you all to come see her.  She'll have center stage that day.

Wednesday, September 26, 2018

Another top done and an auction to tell you about

Good day, all.  Well, I got another quilt top done yesterday and I'd love to show it to all of you.  This one is the t-shirt quilt for my youngest son.  He travels all over and has collected quite a few shirts that he's nearly worn out.  He brought me the t-shirts in June but I couldn't get to working on it until after the elephant quilt was done.  It's ready to go back to the winter house now and be quilted on the LA.  I can't give my featherweight up here enough praise because she sewed through different layers of t-shirt and cotton fabric like she was using a hot knife to cut through soft butter.  It was SWEET!


And, I thought I'd tell you about an auction my hubby saw in his auction paper this week.  It's located in Clare, Mi so I can't go.  Well, I could but I don't want to drive 8 hours there and  8 hours back.  But for some of you it wouldn't be such a difficult hike to see a bunch of featherweights, lots of quilting fabric and books, quilting frames and other quilting stuff get sold. You might be able to take home a treasure or two.  I don't have a clue what things will sell for.  I never know what people are willing to pay at an auction.  But if someone gets to go, let me know how you faired out. The date is Saturday, Sept 29.   Here's the link:
  https://www.estatesale.com/sales/view/196939.html

It's turned pretty chilly here in the northwoods.  A friend over in Wisconsin tells me we might get a snow flake or two on Thursday.  Brrrr!!  I guess it's time to go back to SE Mich.  I'll get to see so many of my quilting friends down there.  That's a good thing.

Wednesday, September 19, 2018

The top is DONE!! Yeah!!

I told you I'd post more pictures so here you are.


I finished the top a few days ago and I'm on to another project already.  I plan on putting something in those corner blocks, maybe the bride and groom's names and the wedding date.  I need to check with the couple before I do that.  But, it's packed up now for the move and I'll do the quilting this winter between teaching classes and doing my usual things.  Every little stitch on that elephant and the borders around it were done on my sweet little Skanie.  That's the name of the FW here at the cabin.  She's a trooper and sews like there's no tomorrow.

I've started a t-shirt quilt for my dear youngest son so the sweet little FW here at the cabin is not feeling lonely.  She'll be sewing until I oil her, grease her gears and replace her motor lube for the long winter ahead.  She'll get cold but be ready for another summer of hot and heavy sewing when I come back next spring.  I'll tell you the other things I do to make sure she's safe for sewing after sitting 6 months.  That story will be coming in a few weeks.


You know how I tell you to use leaders and enders when you're sewing so you have less of a chance to get those thread tangles under your stitching?  Well, this is what I'm talking about when I tell you about doing that.  I have a little pile of 2 1/2" x 2 1/2" squares that I was given in a stuffed gallon bag.  I'm making some little 16 x 16 blocks that measure finished 8" x 8".  They will be made into a donation quilt of some sort.  But, the beauty of it is that I don't get tangles by staying aware of them and actually using them.  You can't imagine how quickly I get that pile of twozies ready to sew together and make the bigger blocks.  Easy---Peezy!


Fall is upon us here in the UP.  It won't be long now and I'll be busy planning the FW Club days and gathering up things for classes.  Keep watching.  I'll have more hints and stories again soon.

Friday, September 7, 2018

Progress on the Elephant Quilt

Good morning!  I bet you think I've forgotten all about that elephant quilt.  I haven't mentioned it in ages because we've had a busy summer with company and more company.  Then, I taught a FW maintenance class and went back down state for the retreat.  I still have company coming but I've had a chance to get back to sewing and I thought you might like to see how I'm doing.

I got all the 97 templates finished and started sewing together the sections.  There's the left elephant ear.

The right elephant ear.

The left and right legs.


The trunk.

And, last, but not least, the elephant's feet.  And, that's it!!


 Now, the next step is to sew these big sections together and start thinking about the borders that have to go around this huge pachyderm.  I haven't sewn them yet but laying them out helps you to see how it will look when it's done. I guess I'd better go get busy!


Stop by again soon.  I hope to get more pictures and let you see more progress.  I'll take the top home to do the quilting on my long arm when we go back downstate next month.  That's another whole event when I do that.

And, for those interested in the FW retreats next year.  The February retreat is now full but I'm accepting names for the waiting list.  There are a few more spaces available for the August retreat.  There's more teaching in me..... and you know I love teaching about the FWs.

Wednesday, August 22, 2018

The First FW Retreat is a Wrap

Wow, I can't believe I haven't had a chance to post here for almost a month.  I get really busy up here in the UP and planning this first retreat really took a lot of my time.  But it was so worth it.  We had a blast.  I told these ladies that I couldn't have picked a better group if I'd selected them myself.  We had 16 in the house and they all chipped in and did whatever had to be done.  I'm sending out a huge Thank YOU to everyone that attended.

Okay, Let's see some pictures of some of the fun.  This first picture is me with the FW case cover pattern and one of the gals that made one at my case cover class.

Here are a few tops that were made at the retreat.


And, here are some hard working ladies at their sewing stations.  Look at those chairs.  Aren't they the best?


Okay, we have another retreat scheduled for February in Tecumseh, Mi and a year from now we'll have one back at the same house as this past weekend in Marshall, Mi.  Both of those retreats have spaces at the moment so email me if you are interested.

Tuesday, July 24, 2018

It Finally Happened!

Well, I've been working on this poor machine for over six months, getting it all oiled, greased and replacing the motor lube.  But it was a poorly treated machine.  The finish is rough.  The decals are worn away in several places.  The machine didn't even work when I bought it. This is the machine that I'm going to ship away to have painted the same color as my little red sports car.

But, I met my match on this one.  After getting everything done for a well needed spa day, I wanted to sew with this one and see how the stitches would be.  I always sew on a machine for at least a month to make sure anything that needs to be taken care of is taken care of.  The stitches are beautiful, even, not bumps on the back or front after I adjusted the bobbin tension and the upper tension.  But what was coming off the motor.  Is that smoke?  Oh no!  It is smoke!!

I don't take motors apart and rework them.  At least, I haven't done that yet.  So this one had to go to the Featherweight Shop for a motor overhaul.  And what they told me gave me a reason to post on my blog and let you know something very important.  If you have been to my maintenance classes, you know this.  If you are following along on my blog because you just want to keep your machine running and working well, you need to pay attention.

Evidently a previous owner of this machine didn't know what that black plastic screw was and thought it was a place to oil the motor.  The motor repair guy told me someone had put oil and grease in that hole after removing the screw.  The oil and grease was causing the smoke and if I hadn't stopped using the machine quickly I could have had a fire on my hands.

The black plastic screw covers the brushes for the motor.  There are 2 brushes and 2 black plastic screw covers.  One you can see on the top of the motor.  The other one is only seen when you're looking at the bottom of the machine.  Don't..... I repeat...... DON'T take those black plastic screw covers off unless you are checking to see if you need to replace the brushes.  It's a rare case to have to replace brushes.  It does happen but probably won't happen to you.


The  place where you do put motor lube, and you'll notice I said motor lube,  NOT OIL, NOT GEAR GREASE, is those small holes on the motor.  They are usually chrome but not always.  One port is on the front of the motor when you're looking at it from the back.  The other port is next to the belt on your machine.   You need to remove the old lube and put new lube in.  Then do it over again every six months at the spa day when you give your machine a once over and make it feel all loved and stuff.


Some white machines don't have lube ports at all. I have a white machine that doesn't have lube ports and there's nothing you can do to lube the motor.  I don't know why Singer did that.  I wish they hadn't.  I think I'll need to send that motor in for service because it gets hot when I sew with that machine for any amount of time.  And, I'm not talking hours and hours.  And, if there had been motor lube ports I don't think that would be happening.

Okay, I need to go work on the elephant quilt a bit.  No, I'm not done with it and I still have a lot to do.  I hope you're having a good summer and I'll try to check in more often.  It's crazy how we get so busy, isn't it?


Wednesday, June 27, 2018

Spa Day


We all know that we need to oil our machines every 8-10 hours of sewing and I do that faithfully.  But, if you've taken a maintenance class from me, you know that I tell you I can't forget the every six month spa day when I grease the gears and lube the motor.  I told you that I do it every year between Christmas and New Year's day.  Sometime in that week, I get all the FWs out that are at the winter house and they get their day of pampering and such.  But, how do I remember the 6 months later spa day.  Well, this week is my birthday week, 6 months from Christmas and New Years so this is the week and today is the day this year.


So, here are the 6 machines I currently have at the summer house patiently waiting for their turn.  This is only half the crew but the other machines are at the winter house and they'll get their spa day when I return.  And, it looks like Skanie get's her spa day first.  I have all the tools I'll need out and the gear grease, the motor lube and yes, the oil to give the once over. 

I want to see if the motor lube is being used as I sew.  That's important.  If no lube is used it might mean the old lube has hardened and clogged the port.  Whatever I find, the old lube gets removed and new lube gets put back for another 6 months of faithful sewing.  Then, I check to see if the gear grease is darkened or is it still kinda clear?  Kinda clear means the old gunk has been worked out.  If the grease is dark or black and hard, it's really important to remove all of it and put new grease on the teeth of the gears.

And, just to be thorough, all the metal to metal parts will be oiled, 1 drop in each spot and each and every FW baby of mine will be up and running to beat the band.


It's fun for me to line up the machines and see the differences in them.  Some have the pretty scroll face plate.  Others have the more modern looking striated face plate.  Some shields are the centennial ones.  Some are the older red S shield.  There were so many changes that were made over the years and I do enjoy seeing each one.

Okay,   I guess I'd better get busy so I can get all these done today.  It's a good way to spend a day of my birthday week.  So, here's your reminder, dear friends.  Go give your machines their spa day.

Wednesday, June 6, 2018

Let's talk needles and skipping stitches on your featherweight

Yes, I'm still working on the elephant quilt but I thought I'd take a break from that here on my blog and give you a featherweight tip to think about.


When I'm teaching the featherweight maintenance classes, people ask me all the time, "what size needle do I need to buy for my Singer featherweight 221/222?"  And, my answer is always, you need to use a standard 15 x 1 needle for your sweet machine.  That's a regular sized needle, the kind you buy for all your modern sewing machines.  There's nothing special to buy.

Well, nowadays there are so many different kinds of needles that it's hard to know what to use.  There are needles to sew jeans or needles for using metallic threads.  There are needles for knits and needles for leather.  But, those are all 15 x 1 needles.  Any of them can be used in the FW 221/222.


I've come to love the needles made by Schmetz.  Those can be found in most any quilt shop or box store that would carry needles.  And, there are a huge amount of different kinds for all sorts of sewing needs.  The standard universal needle is fine.  The larger the number the thicker the needle.  And when you sew heavy fabric you need that thickness so your needle won't break so easily.  Not too long ago I discovered a chart from Schmetz to tell me what size and kind of needle I had based on the color placed on the needle shaft.  Here's the link to that chart.  https://www.schmetzneedles.com/schmetz-color-code-chart/.  So the needle here in my hand is purple on top so that means it's a microtex needle and the color below is kinda orange so the size is 80.  That's a very standard size with a very sharp point.  I like this needle a lot.

Can you use needles that were in the FW box when you bought your machine?  Sure.  You can use them.  Try them out.  They are what was sold at the Singer store to use with your machine.  If it's not rusty, it will work.  I've found a ton of those needles from smaller packages to boxes of a 100.  And, I use them from time to time for regular piecing of quilt blocks or regular sewing, and they are fine.


So what should you know about needles and your featherweight?  Well, look at the top of the needle and you'll see there is a flat side.  On all machines, vintage or modern, the thread always enters the eye of the needle from the side opposite that flat side.  If you look closely, you'll also notice that there is a groove that runs down the shaft of the needle opposite the flat side as well.


You all know to place the needle in the needle clamp with the flat side to the left, right?  Remember when I told you the throat plate is your reminder about placing the flat side of the needle to the left?  The throat plate is straight (flat) on the left.

Well, it's sometimes hard to see when the flat side is exactly straight to the left.  What if it is slightly turned to the front or to the back?  Well, that's where you can sometimes have skipped stitches occur.  So, if you get a skipped stitch and you've tried re-threading the machine to no avail, try moving the needle slightly to the right or slightly to the left to see it that helps eliminate that skipped stitch problem.  And, of course, thread the needle from right to left.


It might be a good idea to think about getting one of those great needle threaders if you have problems threading the needle.  There's a needle holder at the other end as well so you can hold the flat spot in place as you insert the needle into the needle clamp.

And as far as the question about how often to change the needle, I always say that any new quilt deserves a new needle.  That means that every 8-10 hours or when you oil the machine ('cause they recommend oiling every 8 hours), change the needle

Okay, that's all I have for you today.  Enjoy sewing with your sweet little featherweight and I'll get back to sewing the elephant quilt templates.  I'll give more PP suggestions in the next post.


Sunday, June 3, 2018

Paper Piecing - Love it or Hate it

I happen to really like paper piecing (PP).  Maybe I don't LOVE it but I find it pretty simple even when it's a complicated pattern like this elephant quilt I'm working on.  If you don't know what I'm talking about, go back one post and you can read about this quilt I'm working on at the moment.


Why do I like it so much?  Well, you just stitch on a straight line.  What's more easy than that?  And, I don't have to worry about whether to use a scant 1/4" or a true 1/4".  It comes out perfect every time.

So, why do so many ladies really dislike PP?  I usually hear they don't like it for 2 reasons.  One is that they say it wastes fabric and that's probably true.  You will get some scraps that can't be used for much else.  The way I solve that problem is that I always buy a little more fabric than what a PP pattern calls for.  I do that whether it's for PP or not because I like having a little fabric in my stash that I can pull out and use for something little or different.  But if you're careful, PP won't waste much fabric.

The other thing I hear about PP is that lots of people get frustrated because you have to fit and refit pieces to get them to fill a certain space and lots of people find themselves making mistakes and the seam ripper wants to be their best buddy if you're not careful.  So, how do I solve that problem?  You really do have to be able to look at your fabric and template in weird ways.  A piece of fabric seems like it should fit but when you sew it the fabric just doesn't meet the edge or gets cut off entirely.  So, I do have some suggestions for those problems a little later on during the sewing of the pieces.

I have a couple of rules I follow when PP or doing any sewing.  One is that if I'm tired or busy, I'm going to make mistakes.  I can recognize it when I get there.  It's just best to take a break or quit sewing for the night when that happens.  You do have to concentrate when PPing.  The other thing is that you need certain tools for PP or any sewing.  I want a good ruler that's not huge and has an easy to see 1/4" line to measure 1/4" from my stitching lines.  You remember those lines I stitched without thread?  I call them the holey lines. It's essential to measure lots of times to cut fabric 1/4" away.  I found the perfect ruler.  It's the 2 1/2" x 10" Creative Grids ruler with the hearts on it.  You'll see it lots of times in my pictures. You'll also need a good sharp rotary cutter and your usual sewing things.  Don't forget the seam ripper.  If you don't have it you'll need it.  That's the rule.

The PP templates will have a sewing line (solid for my project) and a 1/4" seam allowance line (dotted for this quilt).  I like to trim away the paper 1/4" larger than the seam allowance (dotted line).  Extra paper seems to get in the way but I like having a little extra so if a fabric isn't perfectly to the edge I have a little fudge room.  You know what I mean, just a little extra room for error.


So, I'm ready to sew.  Good PP templates have numbers to tell you the order to sew the fabrics. You have to follow the correct order or you're in big trouble.  In the case of the elephant quilt, the numbers are the template piece and Violet Craft used letters to signify the order.  So, I'll put the first fabric in the "A" position with the wrong side of the fabric facing the paper.  This is the only piece of fabric that gets placed on the paper this way.  All the other pieces of fabric will be placed with right sides together.

I like to trim 1/4" away from the stitching lines for this first piece and I pin the fabric in place using tiny applique pins that tend to stay out of the way.  Fabric will scoot so pinning helps keep things from shifting.  I just fold back the template on the holey lines and measure 1/4" away and cut.


Once the 1st piece of fabric is placed, pinned and trimmed in the "A" spot it's time to position the second piece of fabric that will cover space "B".  I like to cut my big piece of fabric into a strip that will be large enough to cut several sections as needed.  I think trying to cut little pieces off the larger chunk of fabric is one place where people get messed up.  Anyway, I use that 1/4" straight edge that I cut (1/4" away from the stitching line) and I line up my "B" fabric, right sides together. The "B" piece was pretty easy to pin and stitch and fill the space.  But, now I have the "C" piece to fit and it's a wonky line.  I'll mess up if I don't audition that "C" piece.  Does it look like it will fit correctly the way it's pinned in place?


To audition my pieces before I sew,  I fold my template back flat and pin along the sewing line being careful not to bunch up my fabric. That's what I've done in the picture above.  Then, fold the fabric back to see if it fits.  If it does, great. Yup, my "C" piece fits just fine so now I can sew.  If it doesn't fit,  all you have to do is refit and repin to audition it again.  There are times when I have to refit and audition several times.  I'd rather do that than have to take out stitching several times.  I know my seam ripper doesn't like to be all alone and set aside but I'd rather not have to use it every stitch I make.


Once the piece fits and I've sewn it, I can trim the excess fabric away along the outside edges and 1/4 from the holey line for the next piece to be placed.

Okay, that's how simple this PP stuff is.  I'll take a break and add more information in the next post.  I hope you'll find a PP block that you'd like to do and sew it along with me.  And have a great sewing day.  I'll add the next instructions in a few days.
Thursday, May 31, 2018

The elephant wedding quilt project beginning

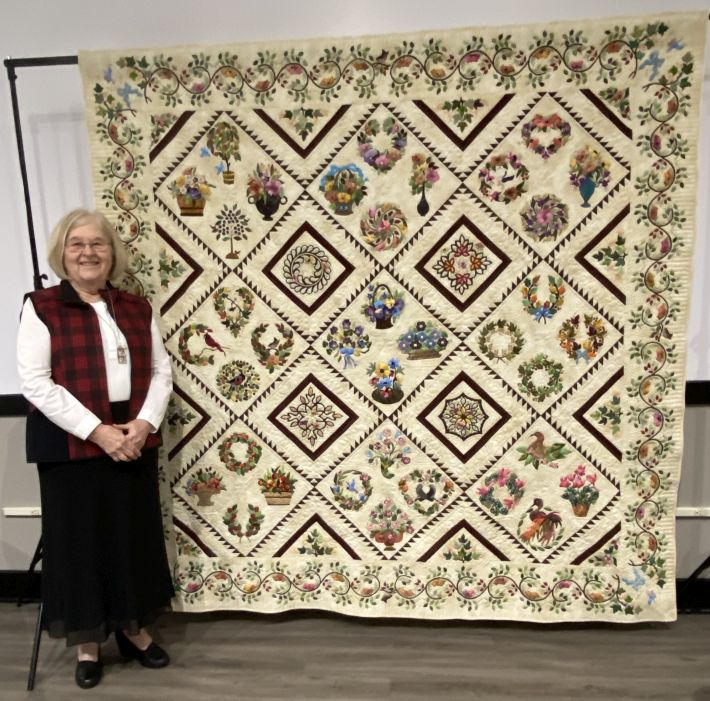
The holiday is over and I'm ready to get started on my summer project.  My grandson and his bride to be picked the Elephant Abstractions quilt by Violet Craft as their wedding gift from me and I have nearly a year to get it done.  So, let's get started.  This may become a tutorial for paper piecing that I'll post as a tab later but let's see how this goes.

Getting organized is probably one of the most important things to do with a project of this size.  Mom was an organization queen and I learned from her so getting the steps to being ready for this project really isn't so bad.  To start with I had to take the pattern template pages to the office supply place and have every page printed to be used.  The templates in the pattern came printed front and back so you wouldn't use those and not have a pattern in the end.  Okay, that's done. It took awhile to cut all the templates apart and stack them in order.  There are 97 templates.  I have my work cut out for me.


Then, I always stitch the lines on the template pages without any thread in the machine top or bobbin.  I do that for 2 reasons.  For one, it makes folding on the lines so much easier.  And, I'll fold on those lines over and over.  The other reason is that when you're ready to tear off the paper, you have lots of holes to make it tear smoothly and cleanly.  Okay.  All the holes are stitched in all 97 templates.  Whew!  That's done.


Okay, paper templates are ready and stacked up in number order.  It's time to get the fabric washed and ready.  I wash my fabric before sewing just because I've always done that.  All this fabric is from the quilt shop so I know it's not going to bleed colors or anything like that.  But there could be a bit of shrinkage here and there. It is cotton after all and cotton shrinks. I'd rather have that out of the way now rather than have a surprise later. But, will I be able to tell which grey is metal and which is titanium once it's washed?  I decided to write the names of the fabrics detailed in the pattern with permanent fabric pens in the selvage of the different fabrics.  I don't want to get mixed up.  That would be bad.


And, I ironed each piece of fabric and folded it for cutting later in the process.  This pattern's color coding is by designs printed on the templates and by name.  So, just having the names won't help me much when I'm picking up fabrics and sewing them onto the template paper pieces.  So, I copied the designs from the templates off my printer to pin them onto the fabrics as well.  Okay.  I think I'm ready to start sewing.  Hmmmm 97 templates??  How long do you think this will take?  I'll try to post my progress and further hints and suggestions for paper piecing as I go along.  Keep checking in.  This is going to be FUN!!